Here is something I posted a while back on the other side of the pond, you might need to select UK/ Europe when using the TomTom site for accessories as they tend to be location specific, but the mount detailed below (before I changed my car and stereo system that connects to the TomTom) should be easily found if you select UK as location - no idea why these parts shouldn't be available in the USA though as the device that sits on them is the same. Please bear in mind the following is European based and therefore when mentioning Free RDS-TMC this is not the case in the USA as I understand it.
The mount supplied with the x40 devices is basic in terms of connectivity, the new accessory mount offers additional ports for use with either the RDS-TMC receiver or iPOD, a line out socket and of course the power input. The mini USB power input can also be used with the newer style of RDS-TMC receiver should that be needed.
Why should you want to couple the RDS-TMC to a device that is equipped with its own Live system? Well not everyone is going to want to pay the monthly charge and if you travel in Europe with a UK sourced device the Live services won?t work whilst overseas.
Lets have a quick look at the new mount:
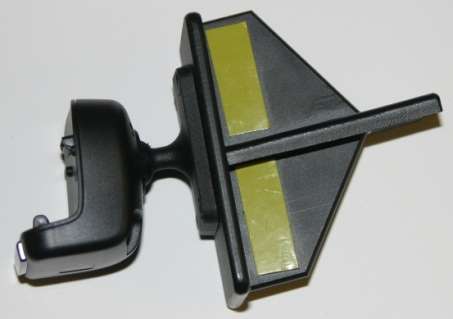
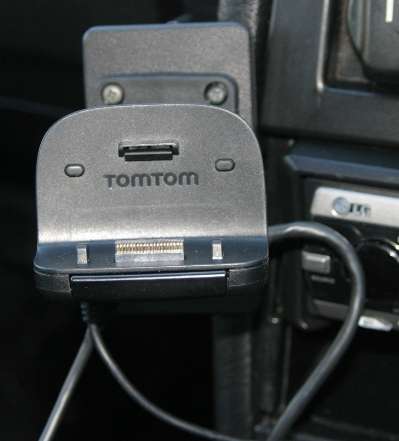
Front:
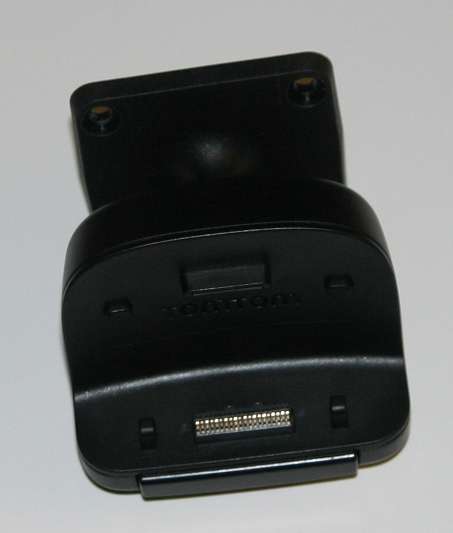
From the front you can see the device electrical connector and the release lever/ locking mechanism that secures the x40 in place on the mount.
Rear:
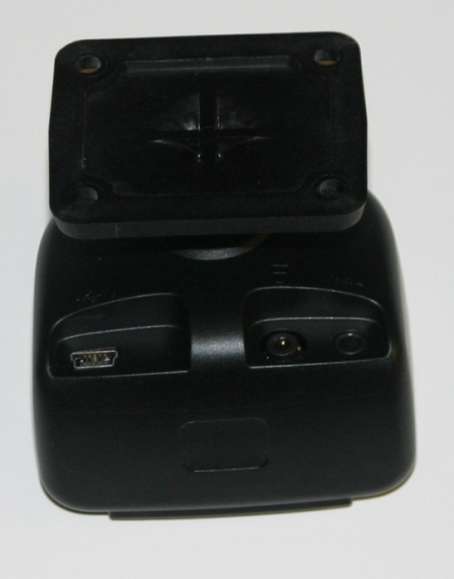
From the rear are the external electrical connectors, to the left is the mini USB power/ RDS-TMC socket, this will work with the newer RDS-TMC receiver that utilises the Mini USB socket.
On the right are two sockets, the first is for either the older style RDS-TMC receiver or the iPOD accessory cable. The socket on the far right is the 3,5MM stereo line output socket.
Note there is no suction cup to attach the mount to the windscreen, which is a welcome addition to the range, no more sucker marks to clean, and for some USA residents this offers a legal solution other than a bean bag style holder.
To attach the mount to the vehicle you will need something like a Brodit Pro Clip, these are made to fit a huge array of different makes and models of vehicles, often different locations within the same vehicle are available for choice.
You can order the Pro-Clip to match your vehicle at the same time as the mount by following the mount selector on
This Page, or go to DSL Developments web site
Here If you find neither site offers the Pro-Clip to match your vehicle then go direct to the Brodit web site and try there for a far more comprehensive selection
Here.
Just to illustrate this point the Pro-Clip I used to mount the 940 in my vehicle wasn?t listed on either the TomTom or DSL web site but it is available from Brodit.
The Brodit Pro-Clip will attach securely to the vehicle requiring no holes to be drilled in the vehicles trim, they are also removable leaving no traces of where they were fitted (important in the case of company cars etc).
The Accessory mount simply screws to the Pro-clip using four self tapping screws, or you have the option to use the Brodit Mini Move it clip which attaches to the Pro-clip and accessory mount using very strong self adhesive tape.
The design of the accessory mount makes the move it clip not really viable as the device has a deep recess on the rear face which offers very little contact area for the clip to stick. It should be possible to fill the recess on the mount with two pack epoxy if you really do want to use the "Move it" clips with this device.
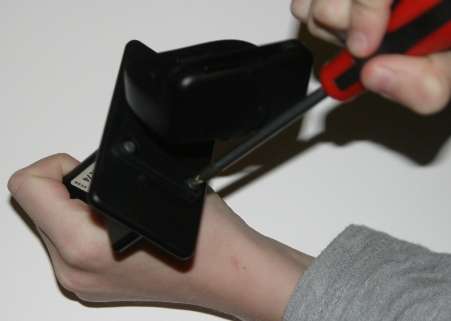
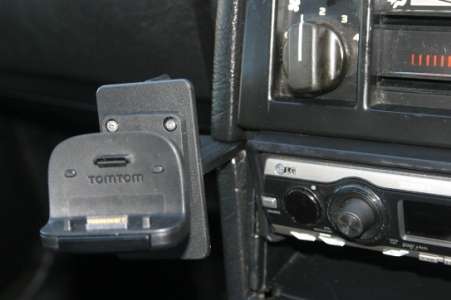
How it all fits to the car.
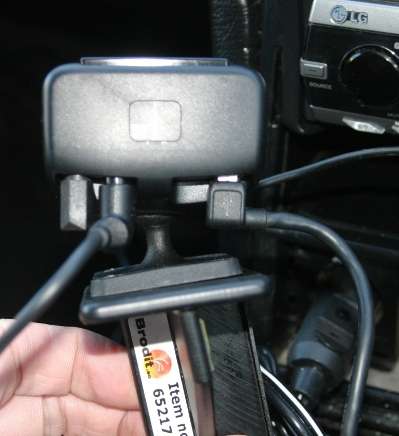
For my installation I chose to use the self tapping screws to secure the two parts together, its not difficult, if you know which end of a screwdriver is the handle you will be able to perform this job. My nine year old son could do it without a problem:
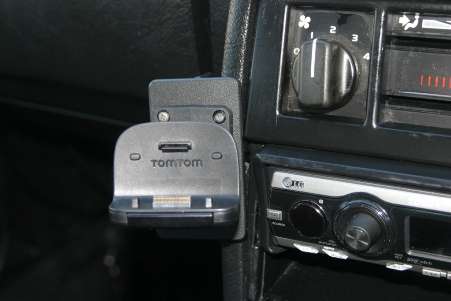
Next you need to mount the Pro-clip and accessory mount into the vehicle, nice and easy as in my case the Pro-Clip simply slides into a small gap between two parts of the vehicles trim.
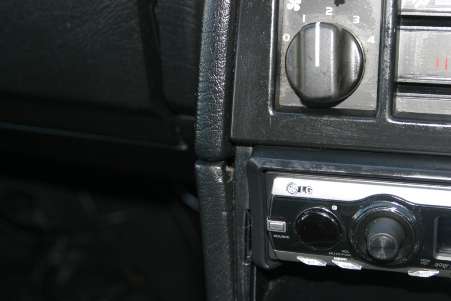
For my chosen mount the Pro-clip is secured with two pieces of self adhesive tape, but these are not really required as the whole assembly is very secure once inserted.
As a tip, try inserting the mount attached to the clip with the yellow protection tape covering the adhesive pads, make sure it all fits as you expect.
Then remove the assembly to peel off the cover tape and slide the whole lot back into position, apply a little pressure to seat the adhesive pads and that?s the job done.
Obviously the exact method of attachment will differ from car to car, but the Pro-Clip is supplied with easy to understand instructions. Some mounts simply clip to the air vents, but the exact method of attachment will depend upon what?s available for your model of car.
Cables
Left hand drive is the order of the day ? right angled cables tend to stick out from the side of the mount, its a minor niggle but I would like to see a range of optional power cables for this mount to tidy up the cable installation in the vehicle.
RDS-TMC, iPOD and Audio Line Output cables are all attached in this picture, although when you dock the device in to the cradle you cannot see too much in way of cables.
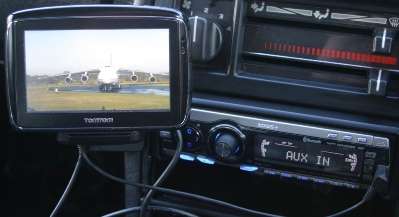
Nice and easy to fit, total time took around ten minutes, this provides a secure, solid mount that doesn't involve suction cups on the windscreen. With the added connectivity the accessory mount offers over and above the mount supplied with the device, its a very well worth addition if you want RDS-TMC or iPOD or Line Out audio - Mike
