Welcome to the forum, this was writted to cover changing the battery on the XL IQ but it should show you what's needed, as you have found the two hidden screws the rest should be nice and easy:
First of all remove the label from the base of the device, carefully peel this off so it can be replaced when the job is complete. The slot you can see in the base is for the Sim card although it cannot be easily removed through the slot as its quite deep within the device.
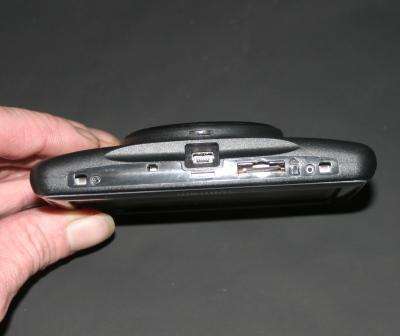
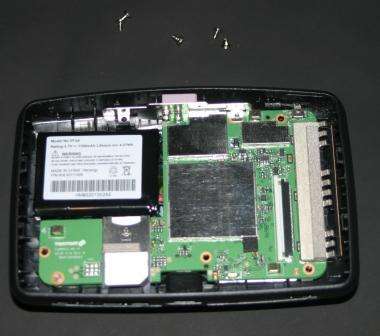
Once removed you gain access to the two Torx screws (Size 5) these need to be removed.
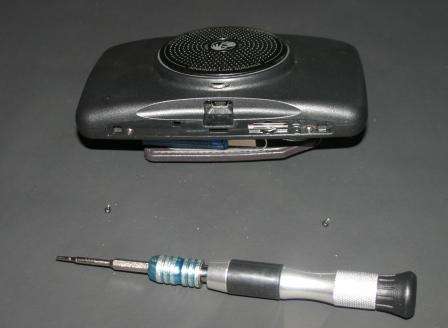
Using your thumbnails to separate the screen from the rear of the device, best place to start is the outboard edge of the silver trim strip surrounding the screen bezzel.
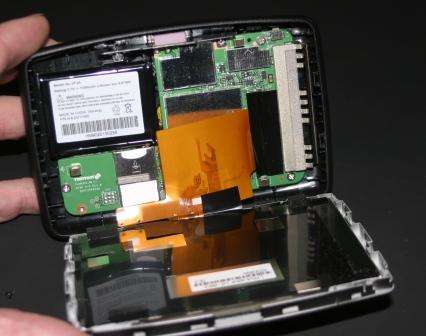
Release the ribbon cable to the screen, I find the easy way is to move the dark brown retainer bar towards the cable using a small flat blade screw driver, no pressure is really needed to move this and it needs to be moved about 2 MM at both ends to release the cable.

The two halves are now separate and you can see the battery (top left) but you have to strip the device down quite a bit further in order to get it out, the screen portion can be set safely aside for the time being.
The PCB is held in with five Philips head screws, these all need to be removed.
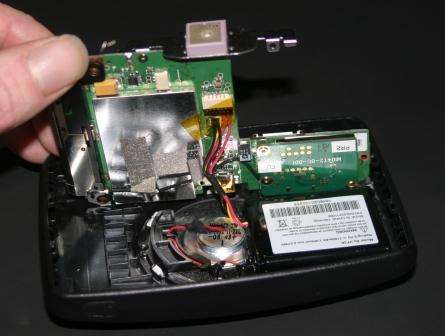
The PCB needs to be raised at the GPS Patch aerial end first as the base of the PCB is still trapped by the Mini USB socket, gently raise this end of the PCB to gain access to the connectors on the underside of the board.

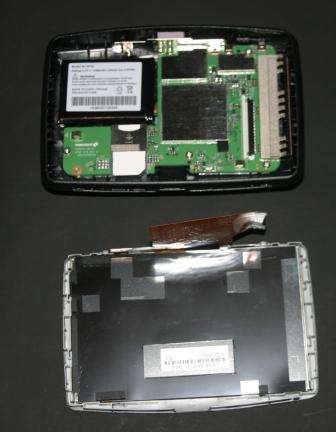
First off is to disconnect the speaker plug which lets you lift the PCB even further up to gain access to the battery connector. Remove the yellow coloured tape securing the connector before releasing the battery connector and remove the PCB putting it somewhere safe for the time being.
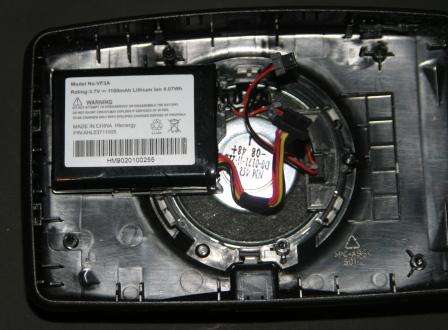
Now all thats left is the battery which is retained with a small amount of glue to the rear of the case, it can be easily removed/ replaced with the new cell.
For anyone after information about the speaker stamped on the magnet is the following information:
NM 4 ohm 2W
D0-0171-11-22L
-08 48+
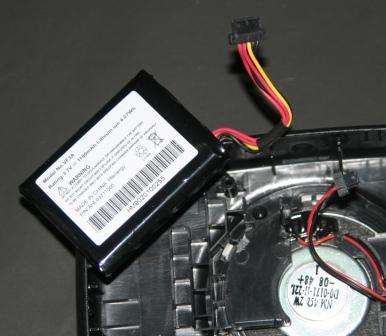
The battery supplied with the device as new is 3,7 Volts rated at 1100mAh, replacement Lithium Ion batteries should be easy to source by the time we need them.
Rebuilding the device is the reverse of how it came apart - Mike


