Indeed the indicator around the on/ off switch should turn green when the battery reaches full capacity, it sounds like your battery is dead, here is how to change it, please consider this was a 940 Live so there might be a few changes, for example your unit won't have the FM Tx board in it but otherwise it should be the same:
With the x40 units age increasing its only a matter of time before the charge retention starts to fail, this shows how to get in to the device to swap out the battery but along the way it looks at some of the technology employed within the device.
If you don't know how to handle taking electronics to bits please leave this well alone as you could damage your device.
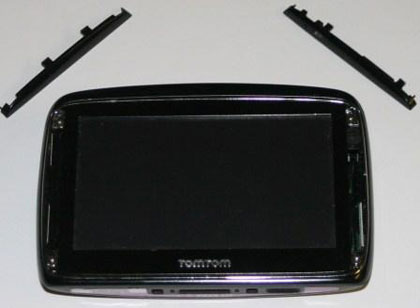
Both side pieces simply unclip from the device, you will need strong thumb nails to get these out though, once removed there are four Torx head screws which are securing the device together.
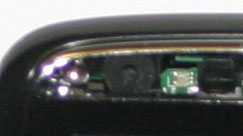
Before we take the screws out a closer look at the right hand side strip now its been removed, this contains two ?windows? the upper on being a simple hole from the microphone, the lower one is the ambient lighting sensor. Interestingly this is a short length plastic ?light pipe? which is employed to carry the light to the sensor which is buried within the device. These light pipes are more often used to feed light to a front panel indicator, and this goes someway in explaining the poor performance of the light sensor when you put the device in demanding conditions (low sunlight dawn/ dusk) I am not even sure this light sensor hardware is even used these days for switching the colour scheme as its more reliable to use the time of day, date and position to work out when the device should switch between lighting modes when set to automatic.
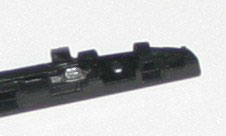
The black ?doughnut? is the microphone, the small white blob to the right of the microphone is the light level sensor, it is a tiny component only a few millimetres across.
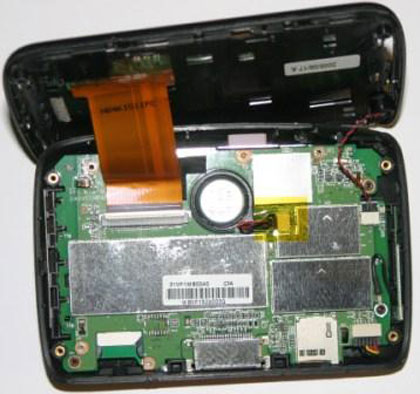
What?s inside the device? With the four corner screws removed the rear case is easy to remove:
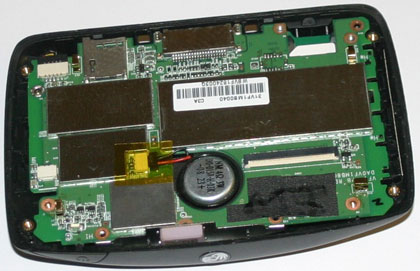
Joining the two halves of the device is the red and black twisted cable on the right, this is the microphone cable and a much larger multi-way ribbon cable. Running left to right along the bottom of the picture is the Sim card slot, the main docking connector, the memory card holder and finally the battery connector. With all the main chips now encased in RF cans there is no ?tin foil? like used to be found in some of the earlier devices.
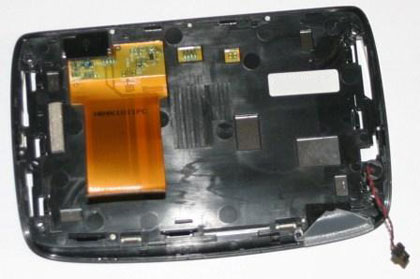
With the battery connector disconnected first the ribbon cable and microphone can be released, this allows both halves of the unit to be separated, above is the screen portion. Surrounding the on/ off switch is another ?light pipe? (lower right corner of the above picture), this is what illuminates red while the device is on charge and green when powered externally and fully charged. It is possible to split the above assembly down even further, the screen is released from the front as it is simply clipped in place.
To extract the main board you have to remove six torx screws, one is partially hidden under the black stick tape to the right of the speaker. Note the screw lower right corner is also used to connect the small FM Tx aerial board to the main PCB (Where applicable, 940 only). Make sure you disconnect the battery (upper left) and the speaker plug which is just to the left of the speaker. The PCB is secured to the case with two slots at the bottom of the board either side of the docking connector, lift the board slightly at the top before it can be simply lifted out of the housing.
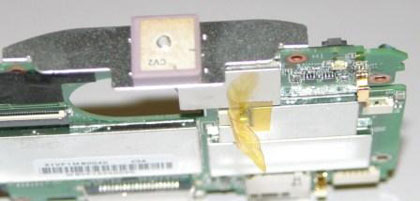
A view with the board removed showing the GPS patch aerial:
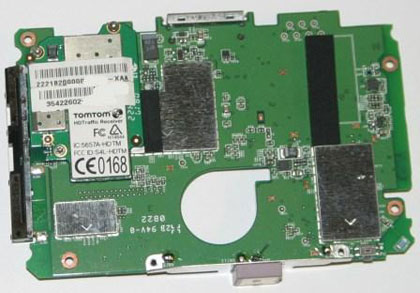
The other side of the PCB, where you can see the HD Traffic receiver, the lower number on the bar coded sticker (top left) is the units IMEI so don?t go showing that in pictures. Again with all the chipsets under metal screen cans there is very little to see.
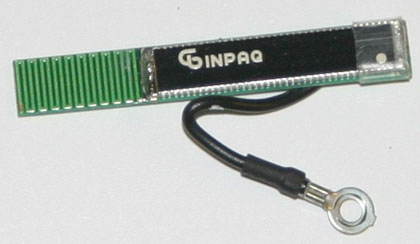
I mentioned the single wire connected to the main PCB via a mounting screw, attached to the other end of the cable is this small FM aerial board, see
Here for product details. It would also appear the GPS Patch aerial is from the same company when you look at the product range. NOTE this FM Tx aerial is ONLY fitted in the 940 none of the other devices have this hardware which explains why you cannot use FM Tx on anything other than the 940.
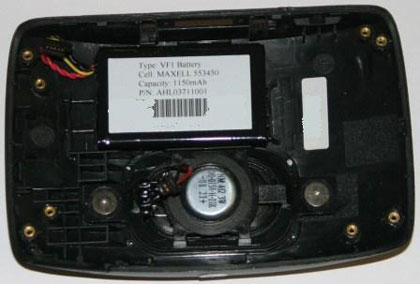
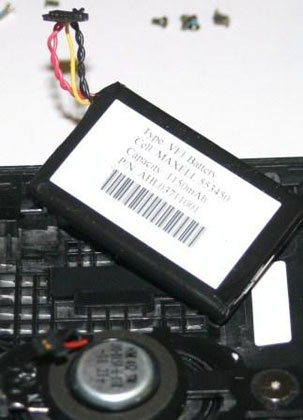
And finally the battery, it is glued into position but can be easily removed, at least they have stopped the rather silly idea of gluing the battery to the main PCB!